Description
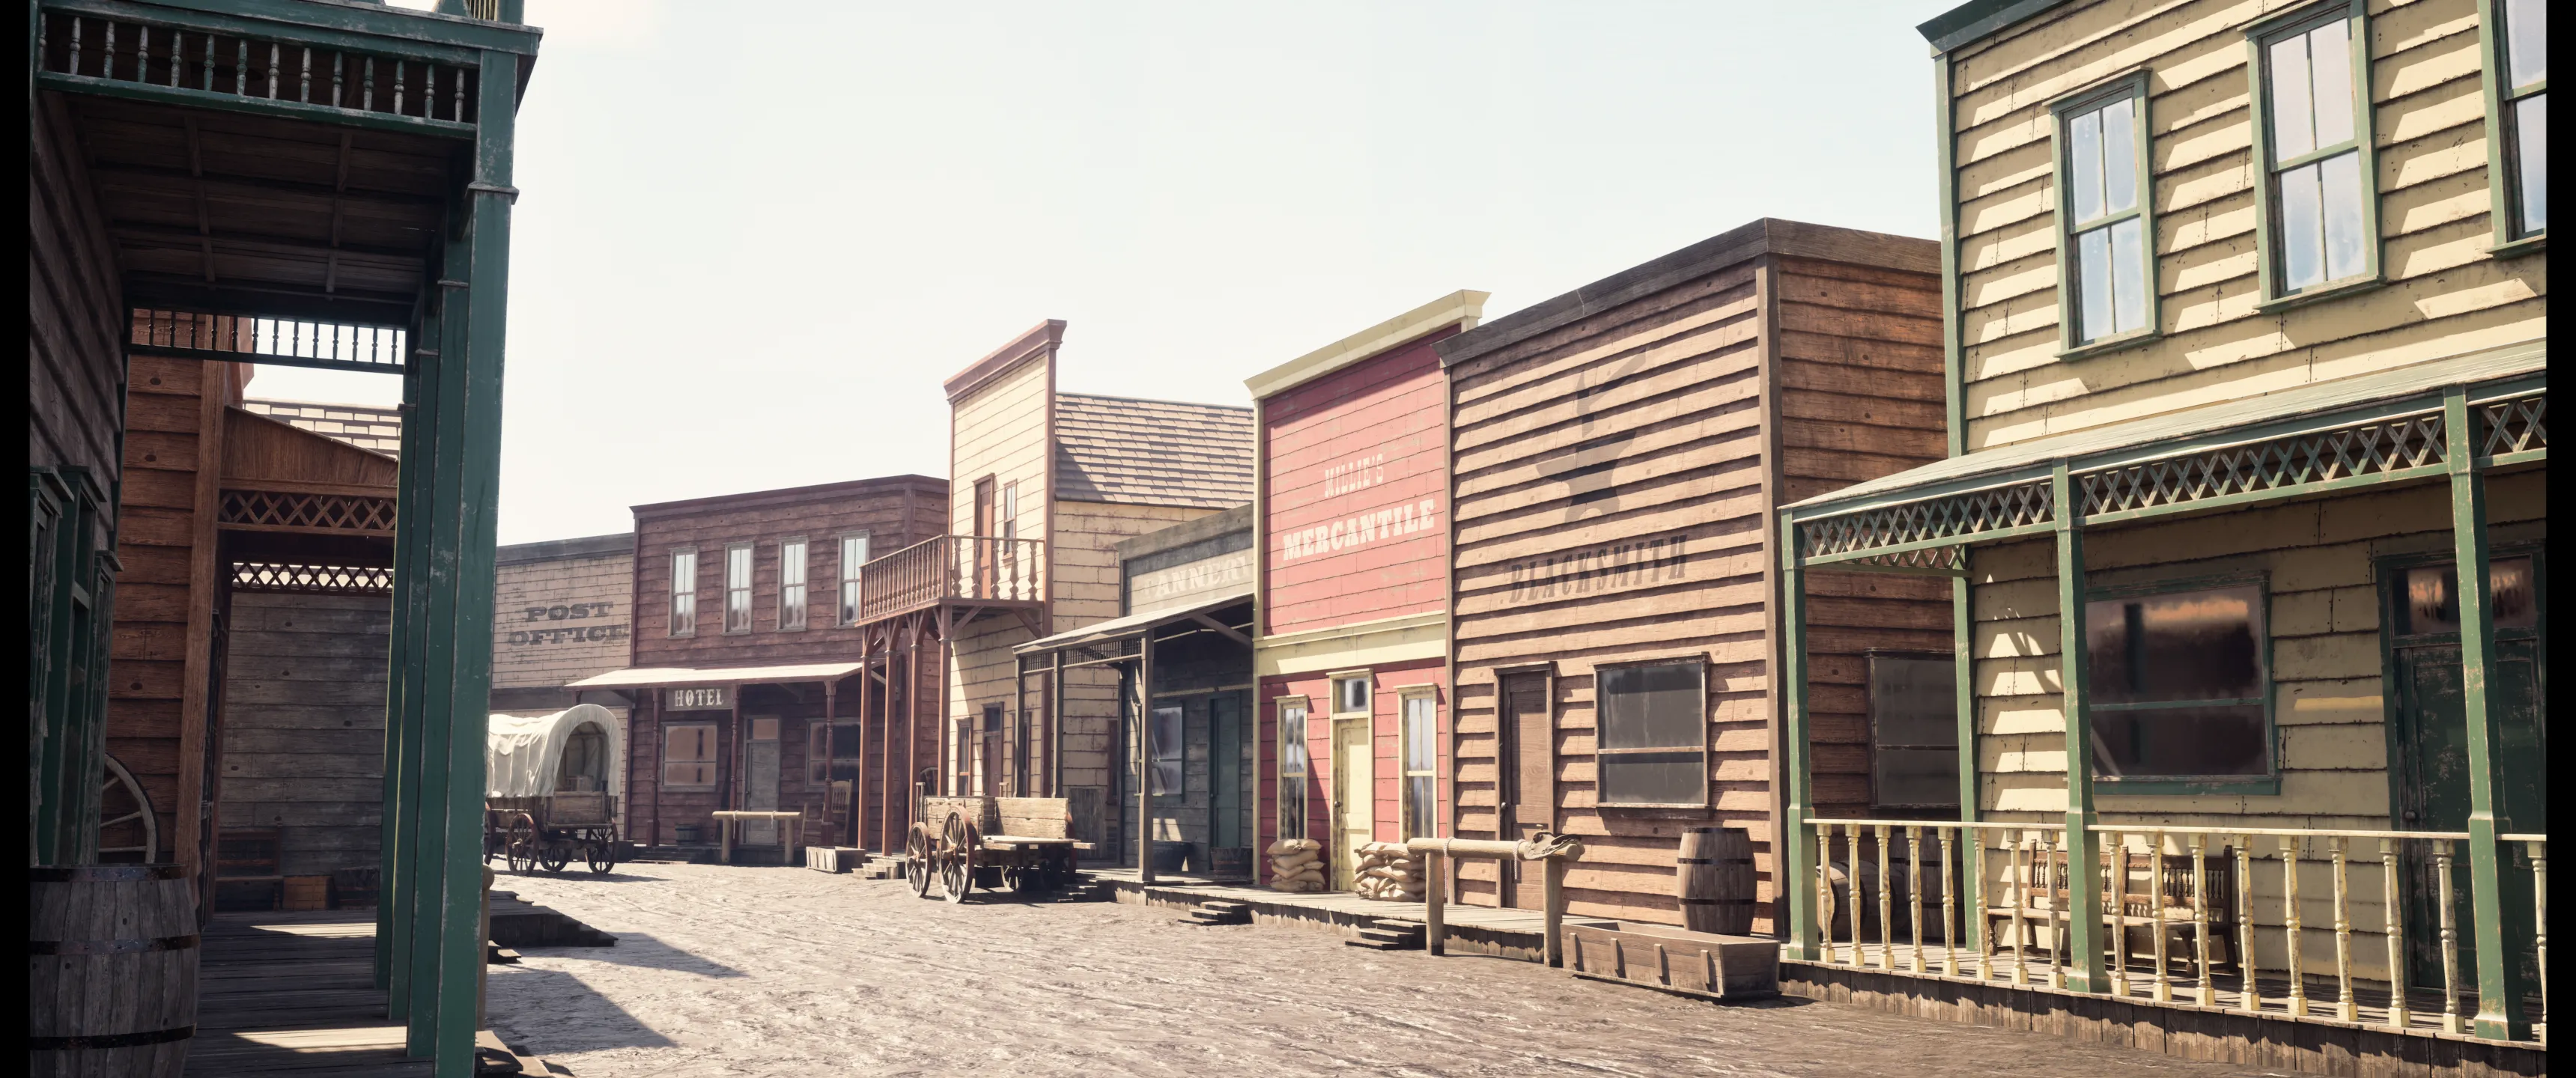
Having made a few game-ready models and a collection of game-ready props, I decided to take things a little further by creating an entire game environment.
Though aided by a tutorial, this was still a rather big and complex project for me to tackle. However, thanks to it, I learned a lot about how to:
- create a diverse environment from a range of modular pieces,
- build parametrized (i.e. customizable) procedural textures from scratch using Substance Designer,
- create custom LUTs and decals and employ them in projects,
- compose complex parametrized materials,
- utilize UE5’s Boolean and Sculpt tools,
- use a Post Process Volume to add additional visual effects to the scene.
I will try to dive a little deeper into each one of these below.
Modularity
I should start by saying that not all of the assets used in this scene are mine - I used a few models from Fab to save time and enrich the scene a little.
To better portray what is(n’t) mine, here’s a little ownership diagram:
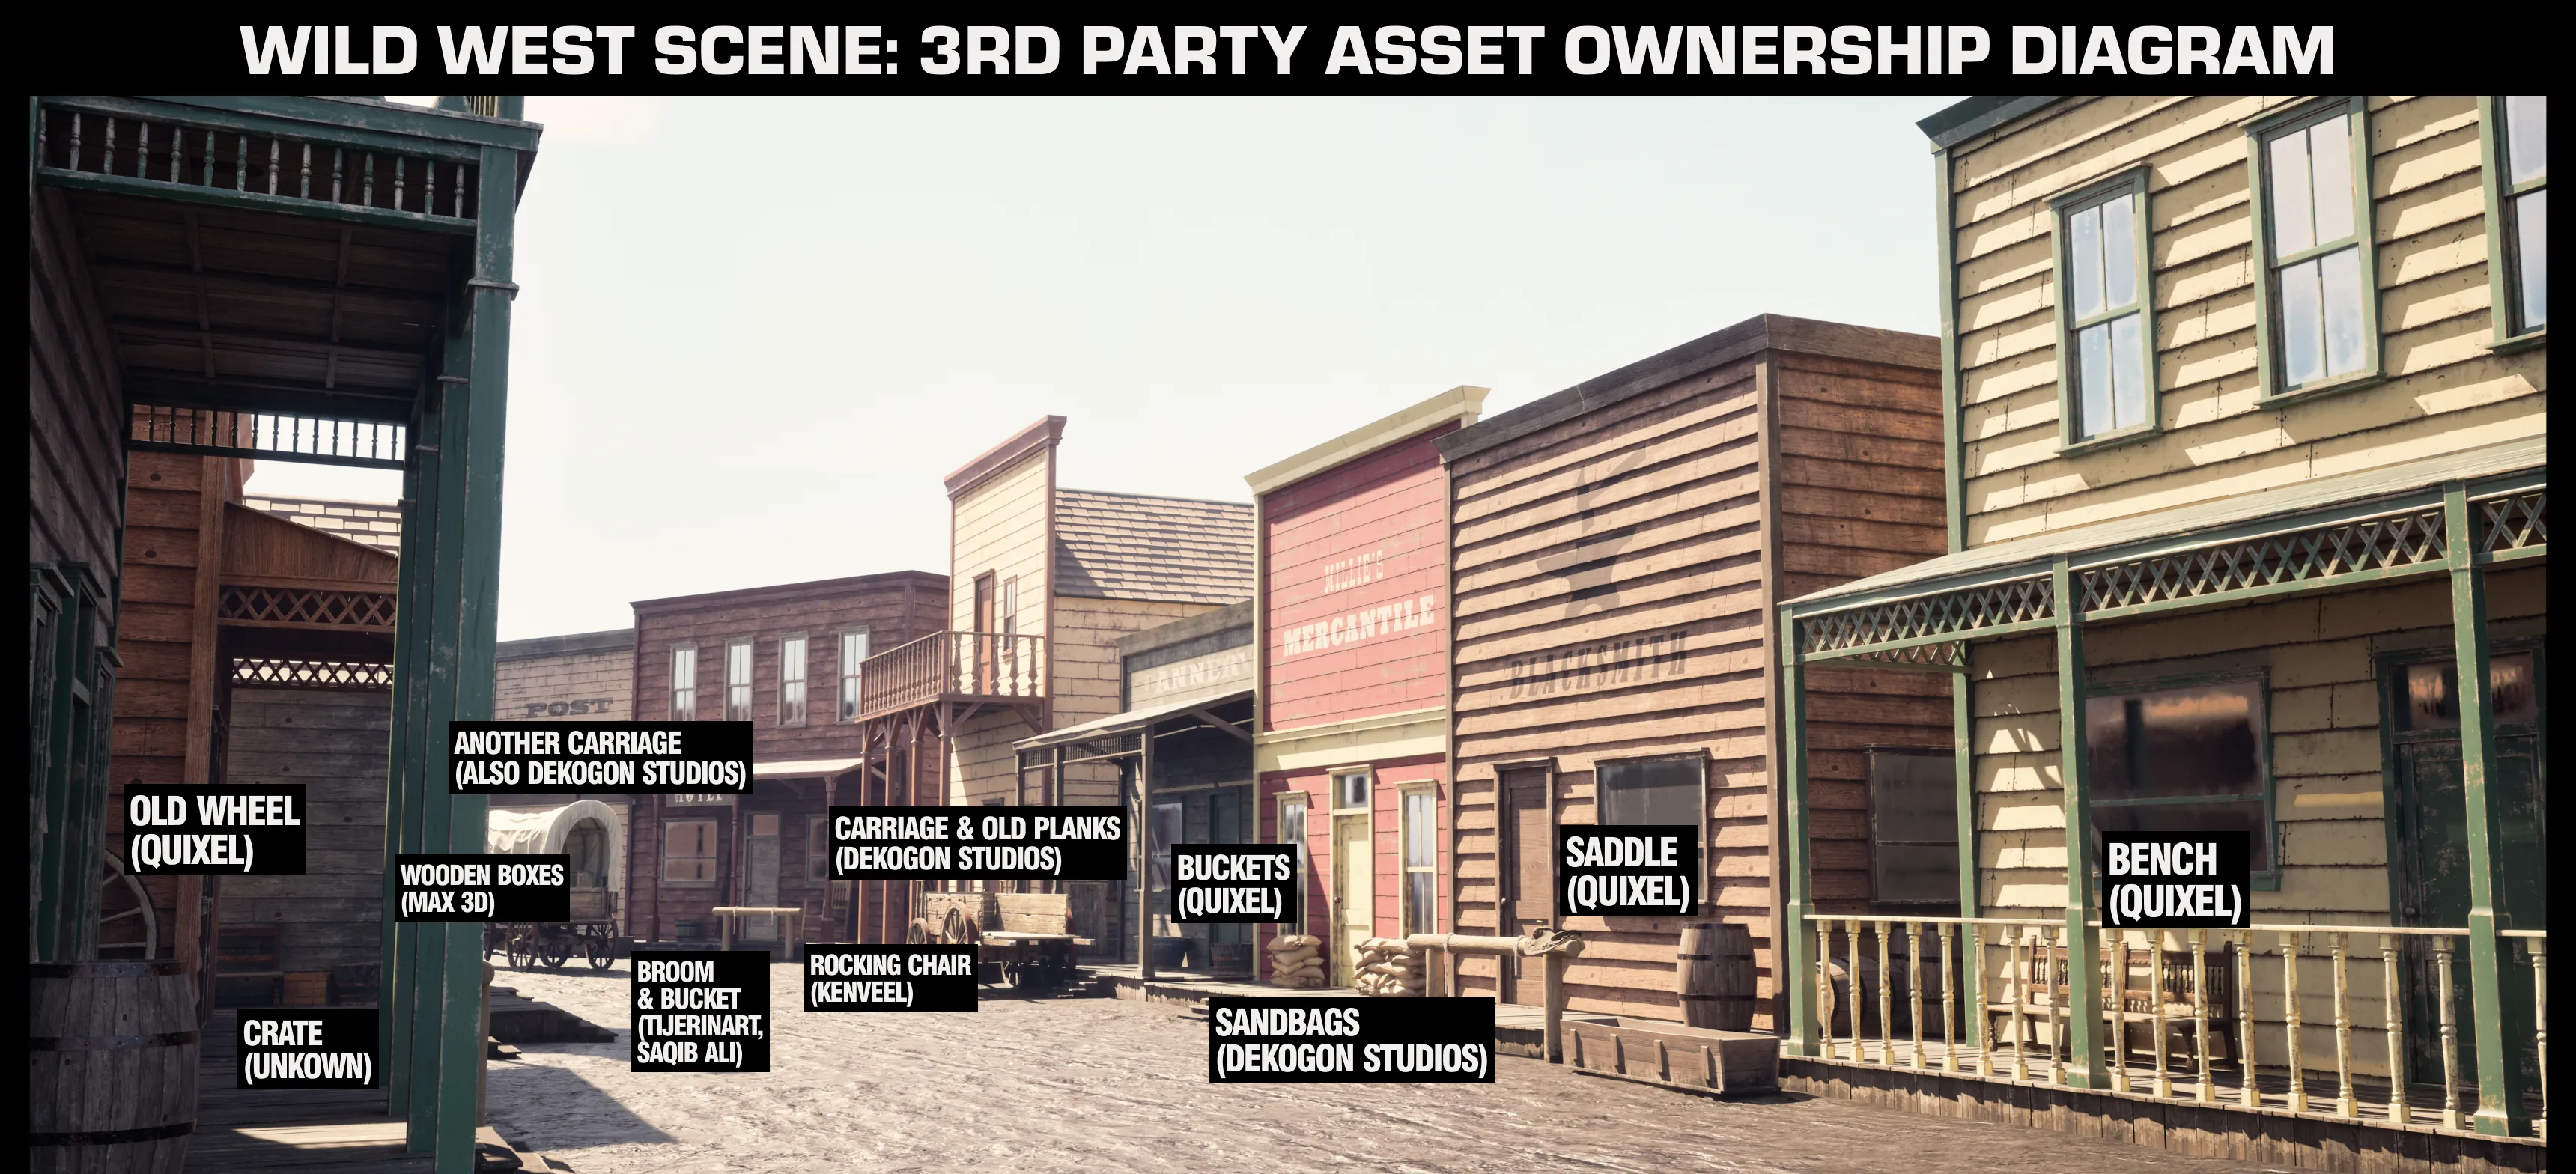
In contrast, these are the assets made by me:
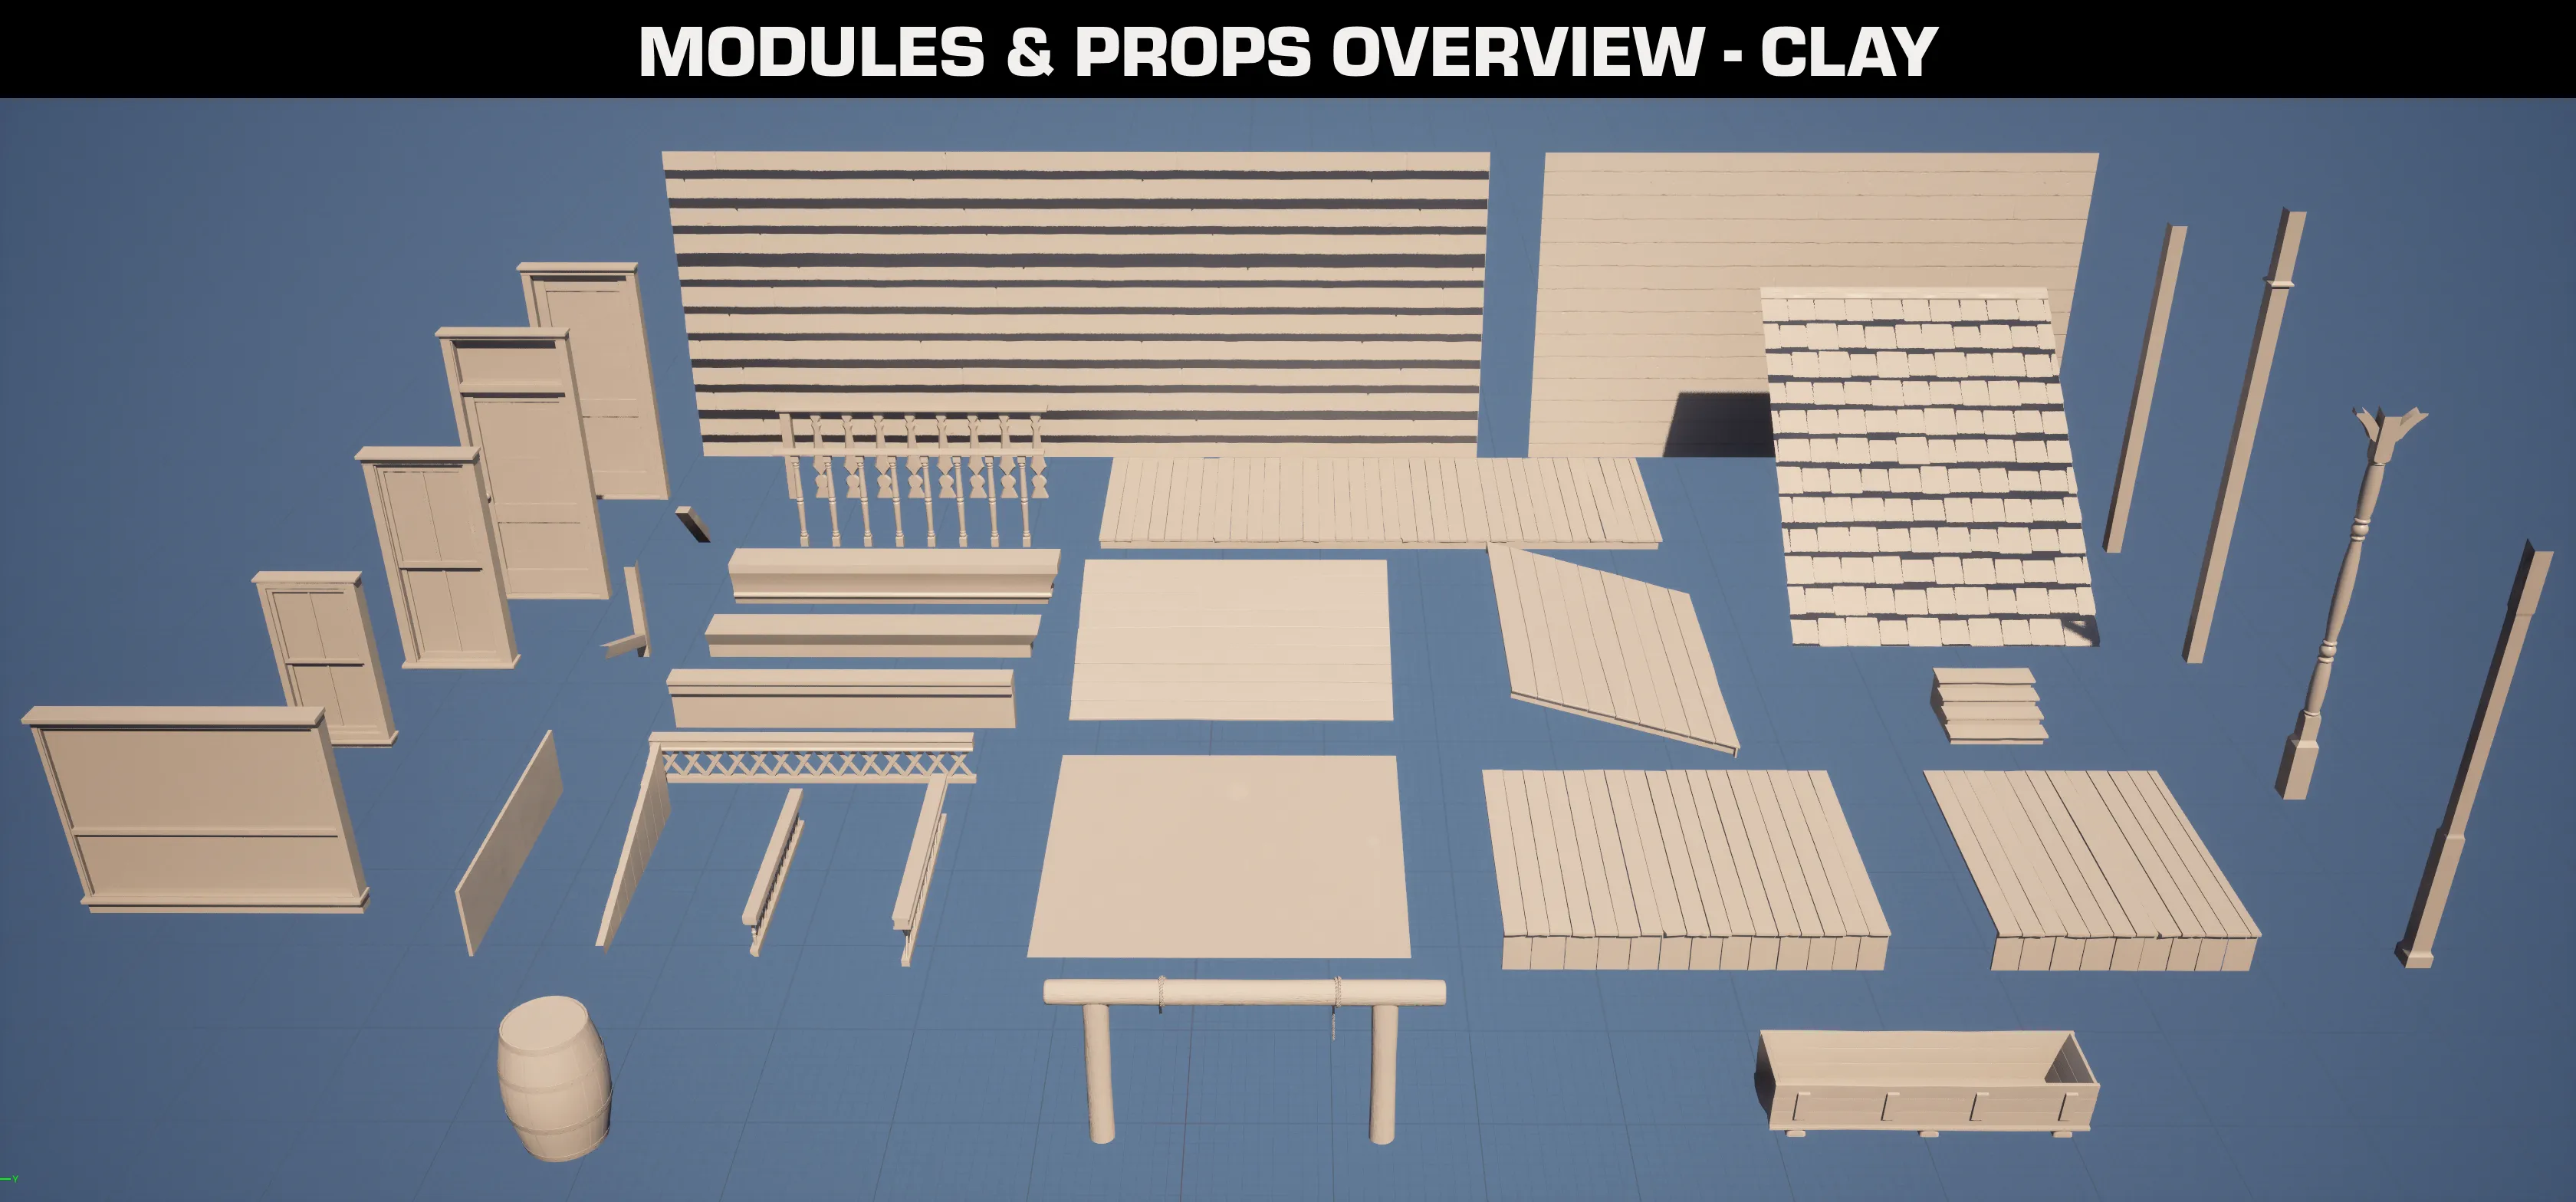
As indicated earlier, all those pieces were made with modularity in mind. As such, they share some of the dimensions so that they can fit well together when placed in the scene. I also included variations of some of the assets, which, along with customizable textures, helped me avoid a repetitive look.
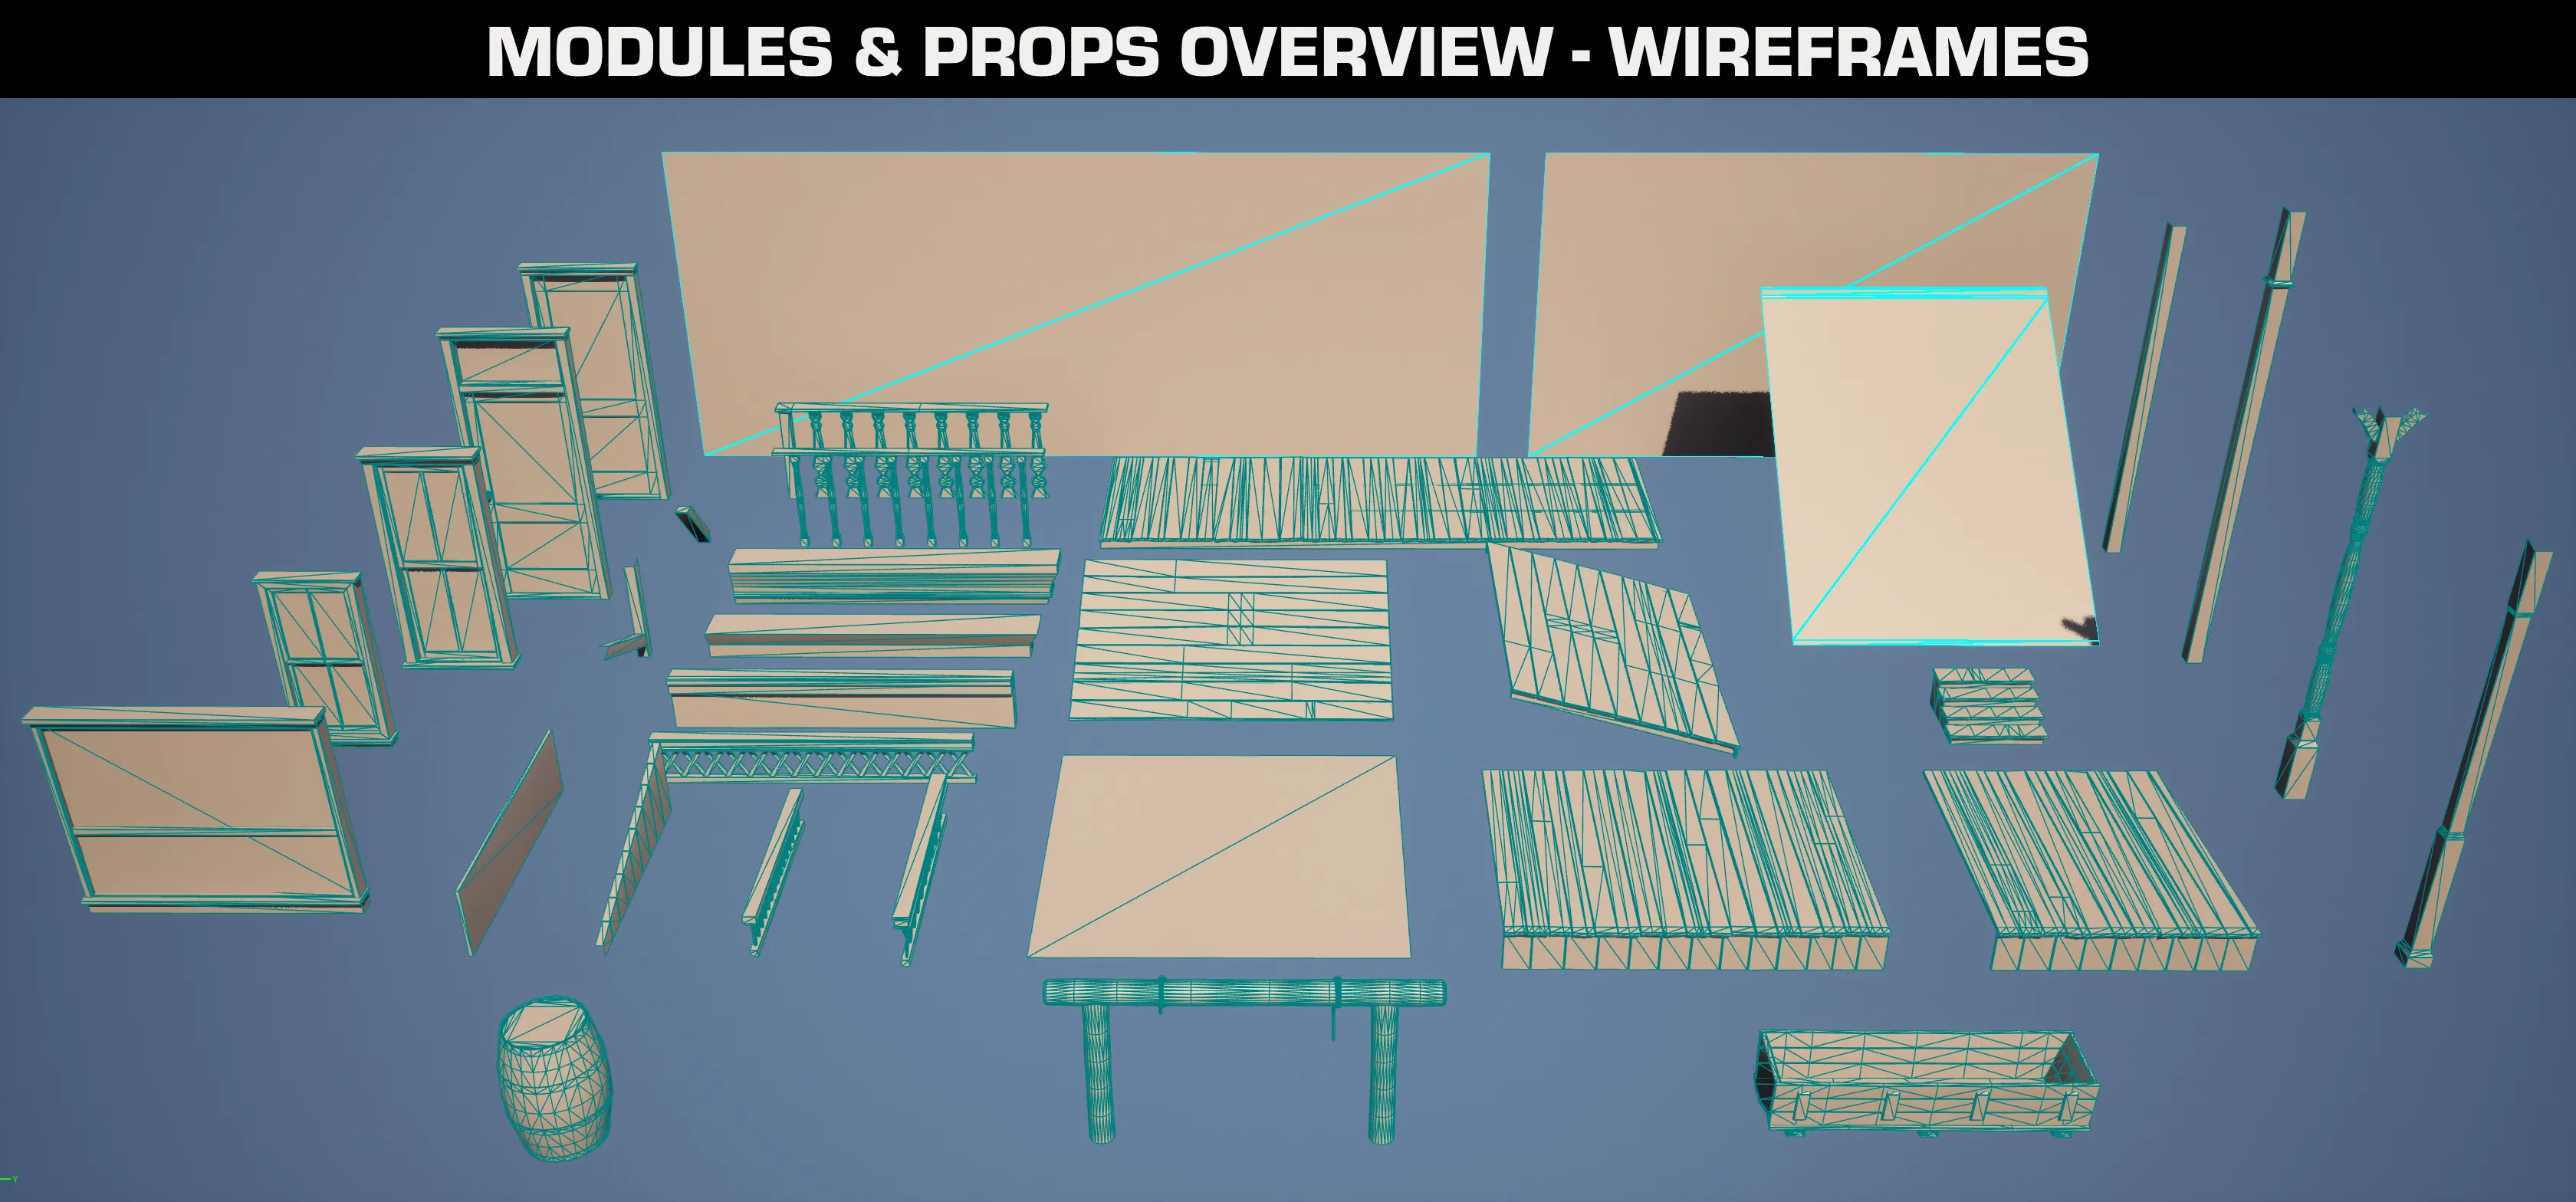
I tried to maintain decent topology in the above models, however my priority here was on the looks, so some parts may look a little weird. For example, I broke up the wooden boards with some edge loops that I then dragged lower than the rest of the mesh when modeling, to create a more believable, uneven surface.
Booleans
You may have noticed that the doors and windows of all buildings in the scene are somewhat sunk into the walls. To avoid these elements from clipping into each other, I used a boolean tool built into the engine to carve out parts of the walls in the shape of said doors and windows to make space for them. This has resulted in inflating the number of unique meshes in the scene, since each boolean operation creates a new mesh. However, it has also allowed me to create more believable buildings for this scene, and familiarize myself better with that particular tool available in the engine.
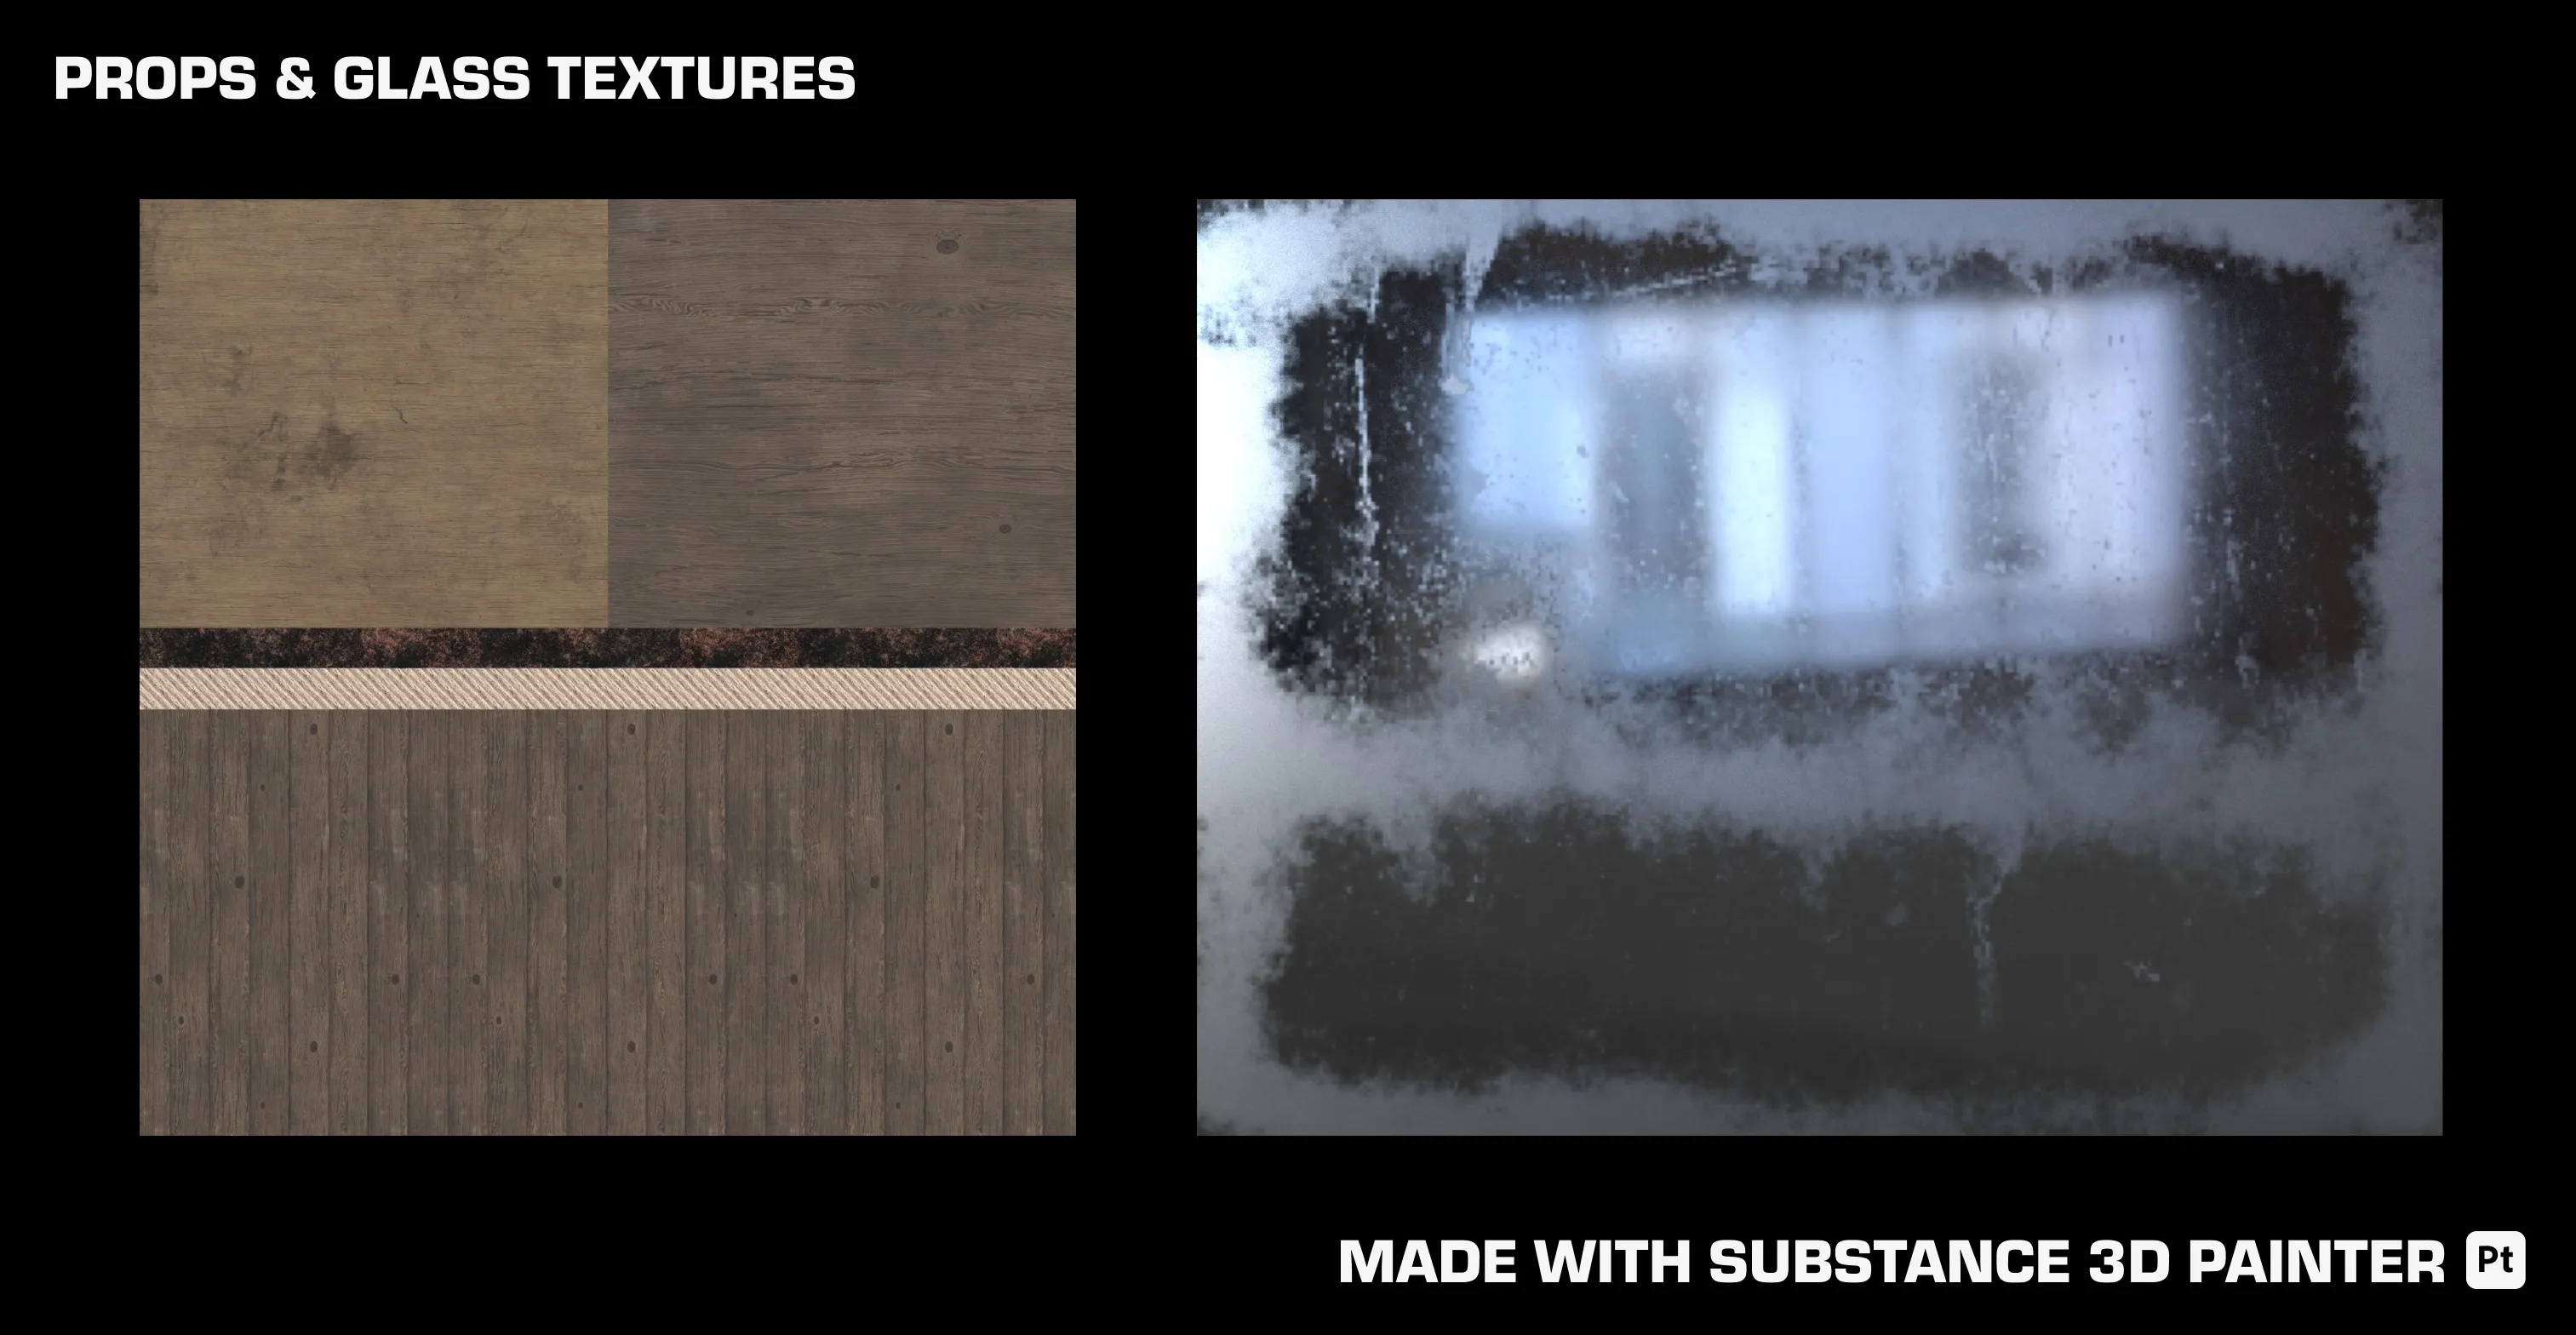
Materials
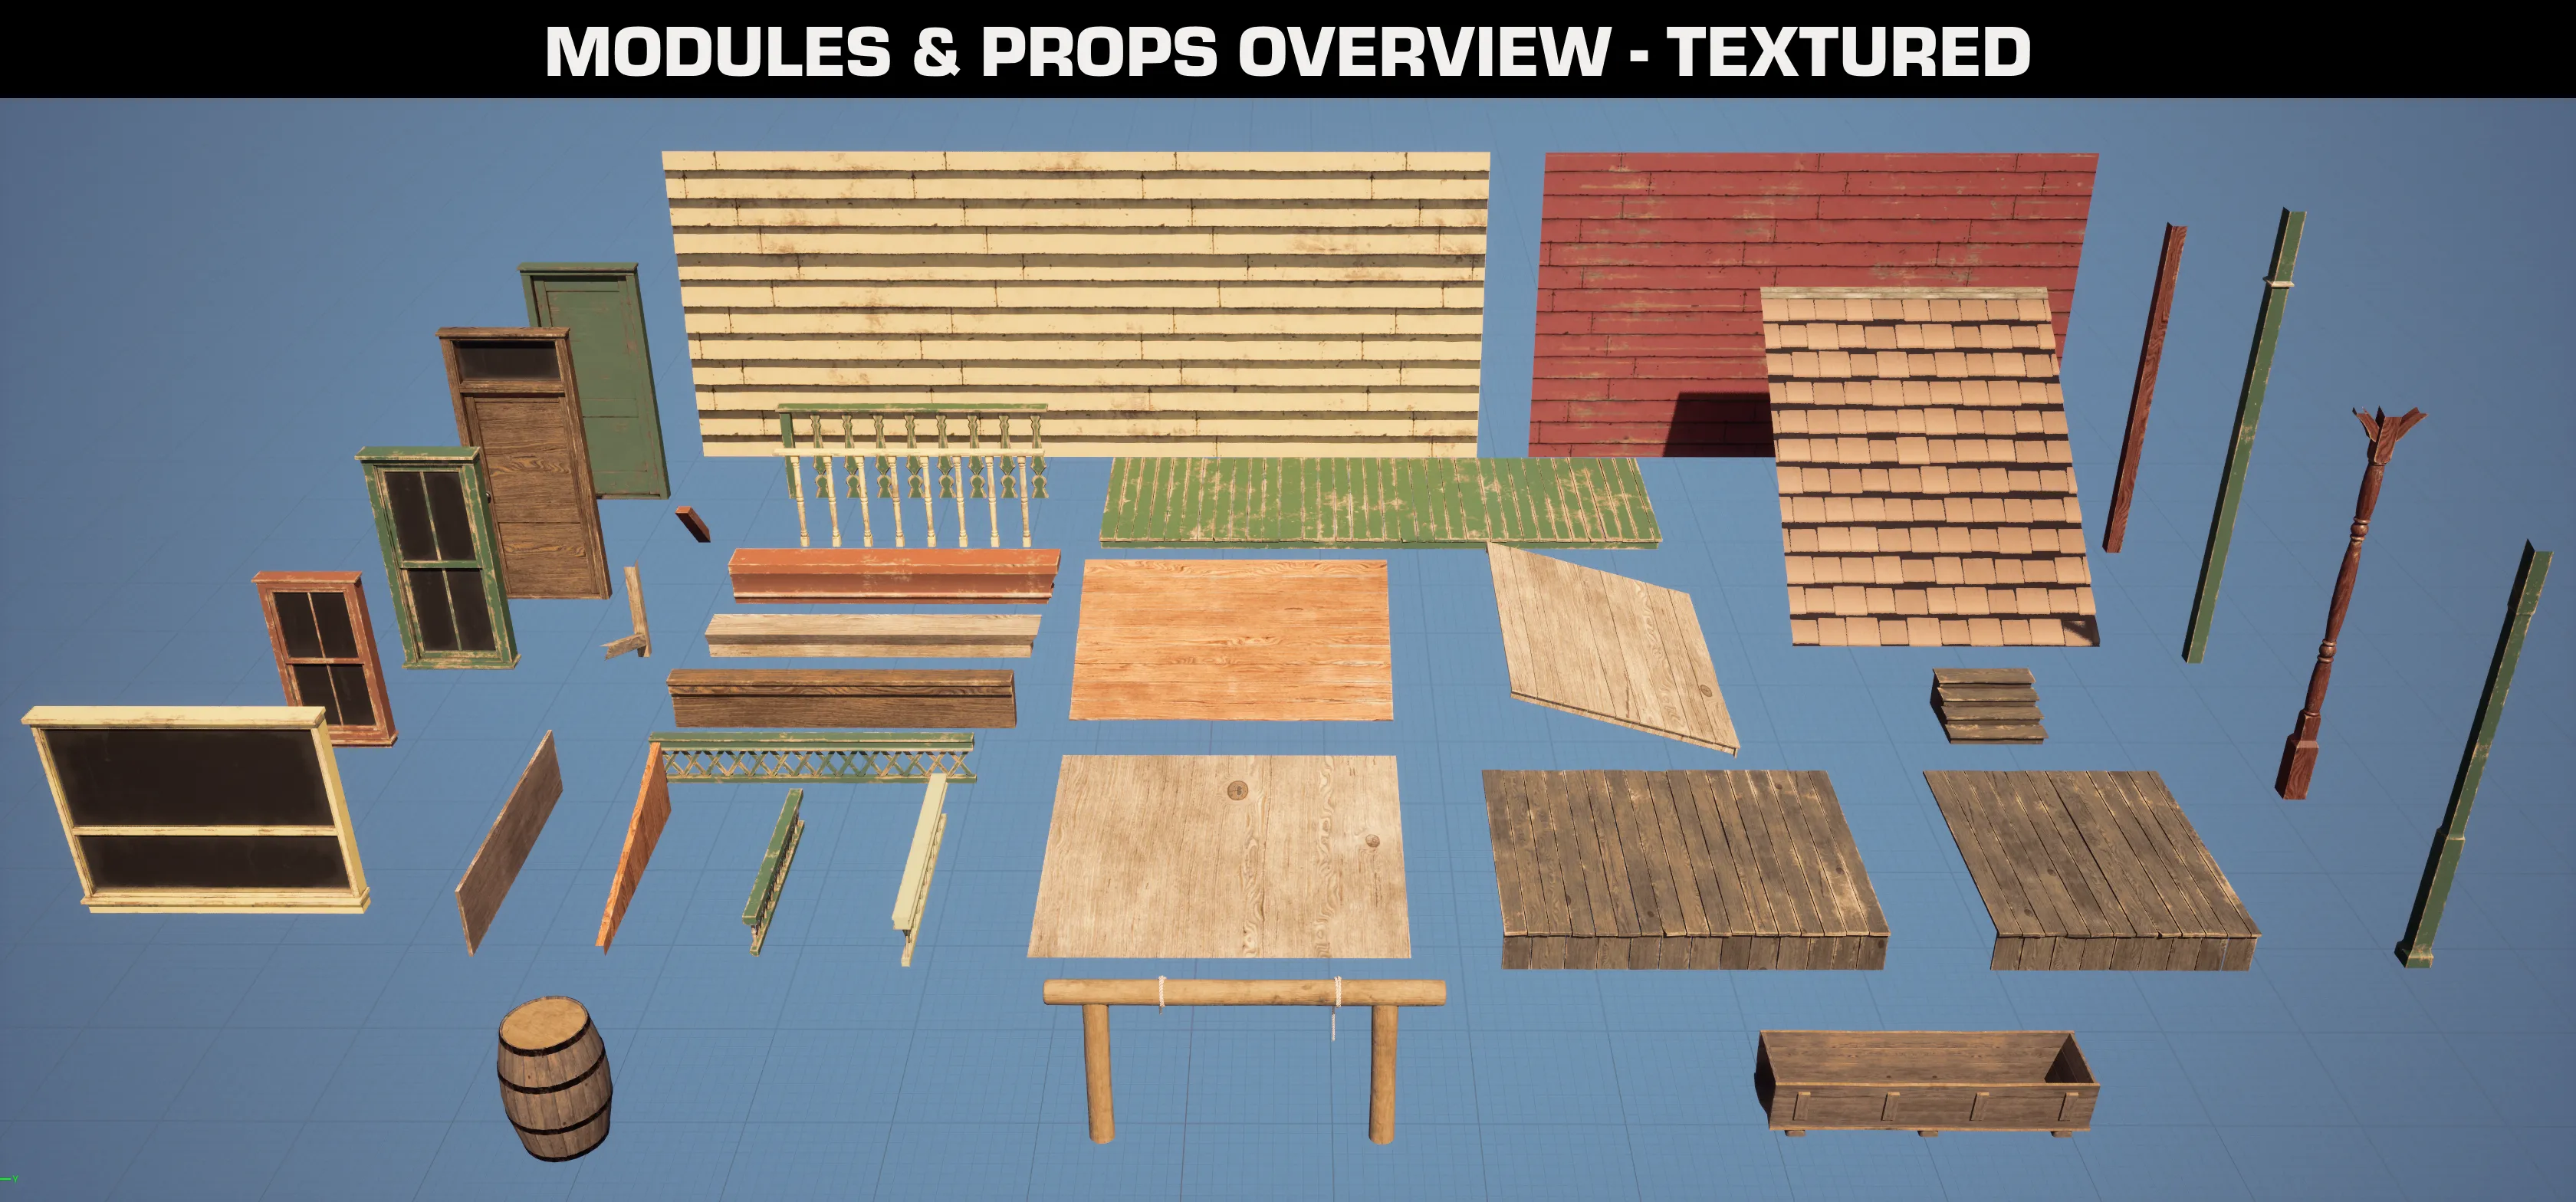
As part of this course, I created three types of materials:
- bespoke procedural materials for the modular pieces and the landscape,
- a texture atlas for props, composed of textures available in Substance Painter,
- a separate material for glass panes (reflective surface without transparency for simplicity).
The atlas was used to texture the bottommost 3 models: the barrel, the hitching post, and the water trough. It includes textures of:
- 2 different types of plain wood,
- procedurally generated wooden planks,
- a rope,
- rusted metal.
For the rest, procedurally crafted materials were used:

On top of said materials, I also made per-model variation masks for each modular piece, with RGB channels as layers for dirt, wood weathering and paint wear. I included parameters for their strength in the master material, together with controls for color variation, normal map strength, and roughness.
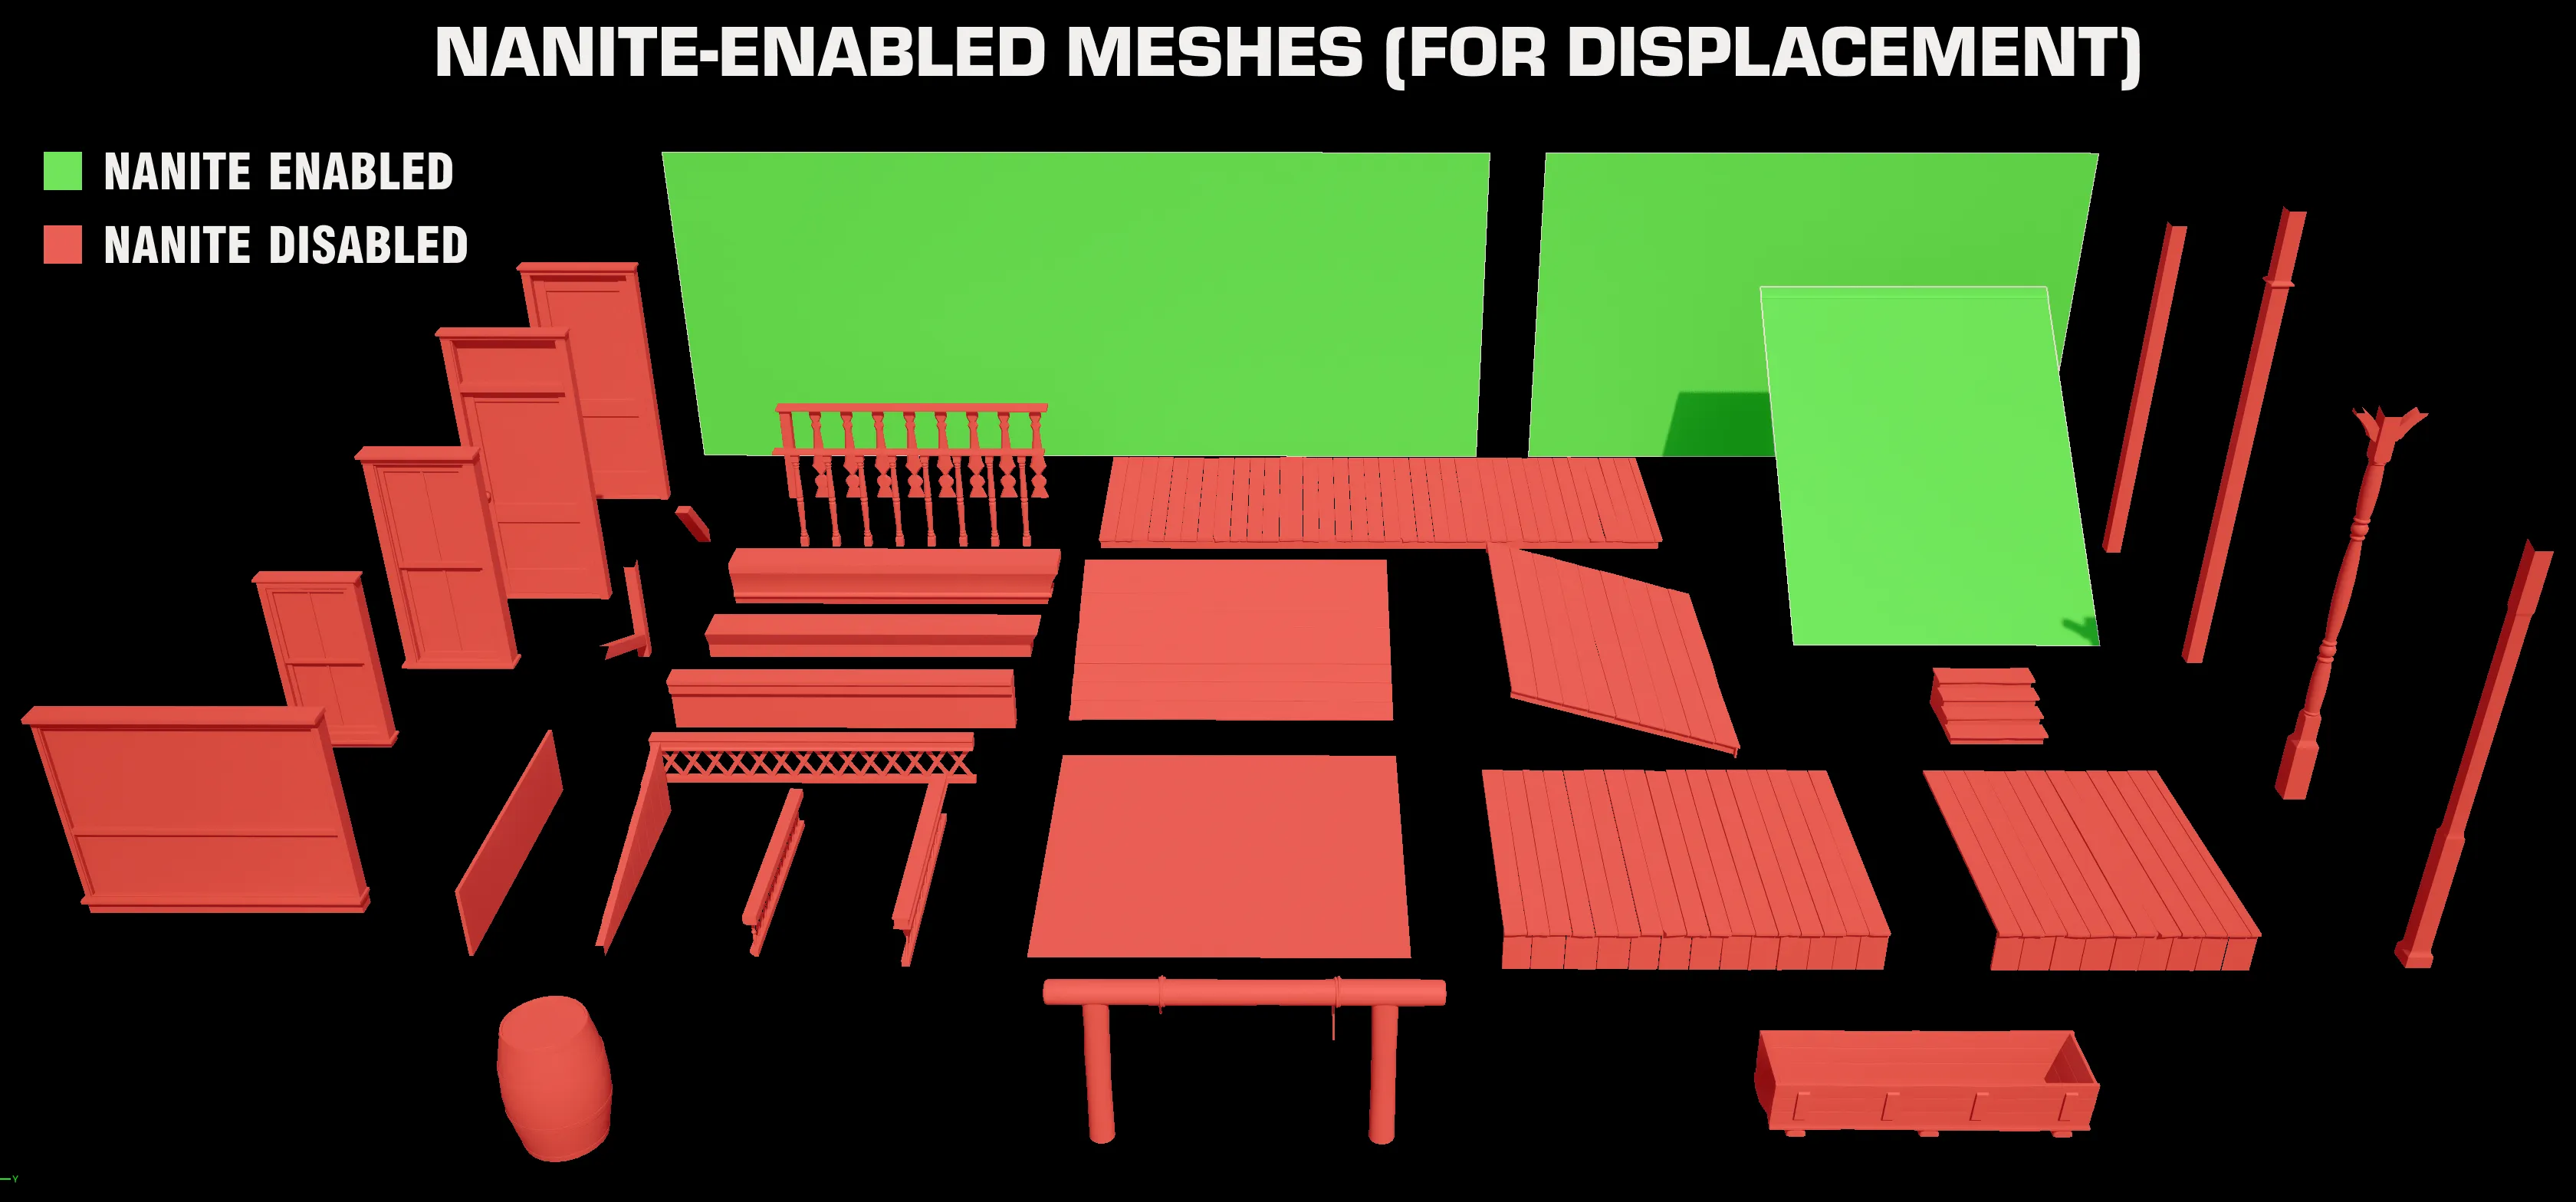
Nanite
Originally, the tutorial called for a clapboard texture for walls and shake shingles for the roofs. Towards the end, however, the author backed down from using displacement to drive both of these, in favor of modeling in some of the more pronounced geometry details into the modular pieces themselves. Since that took away the flexibility of per-material-instance texture scaling, however, I decided to stick to displacement for my scene. To properly support it, I enabled Nanite on some of the modular assets - you can find a summary of that below:
Finishing touches
With only the above textures, the scene as it was looked a little bland. To help with that, I employed the use of decals - alpha for text on buildings, normal map for the ground. These are the ones I used:
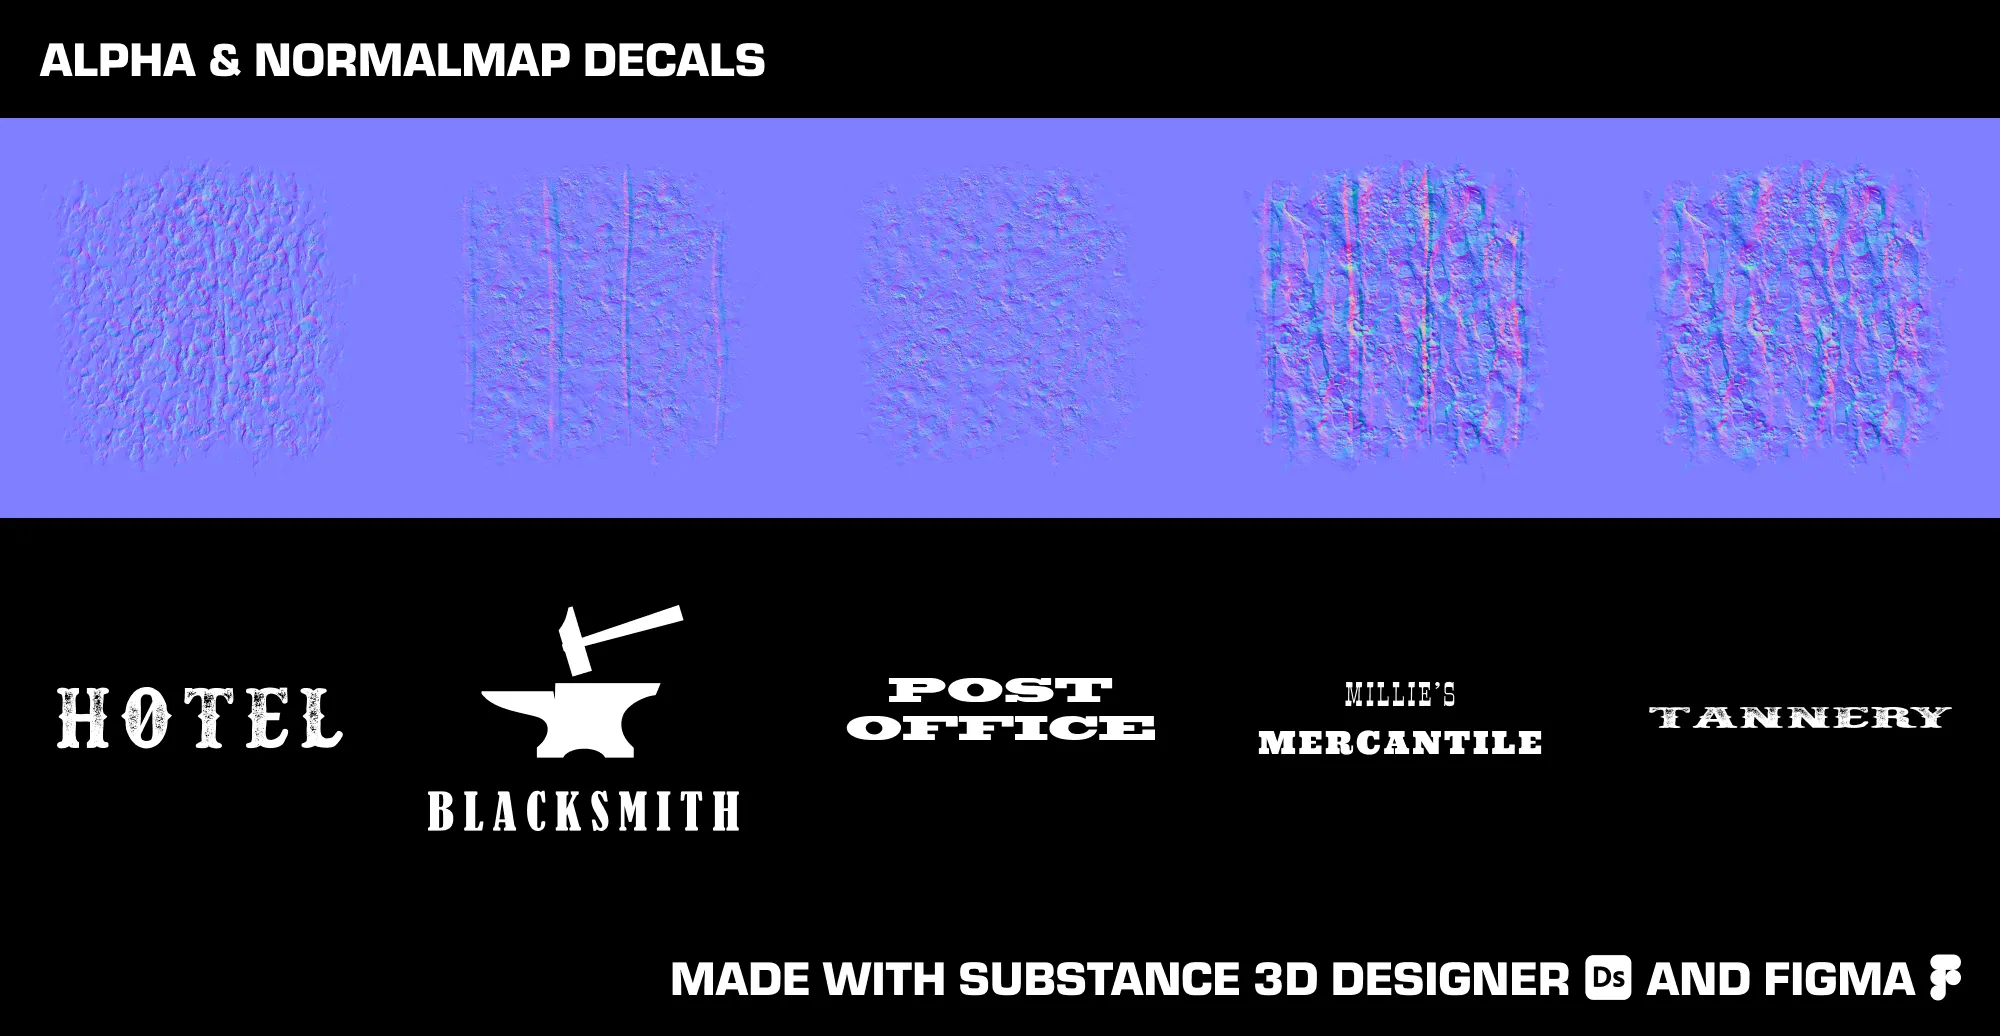
These added a lot of flavor to the scene, especially to the ground over the plain ground texture, without increasing the geometry count. Aside from that, I also used the engine’s built-in Sculpt tool to give the ground plane some additional authenticity and get to know UE5’s toolset better.
In addition to alpha and normal map decals, I also downloaded some CC0 leaks textures and used those as alpha, basecolor & roughness decals on roofs, overhangs etc. throughout the scene.
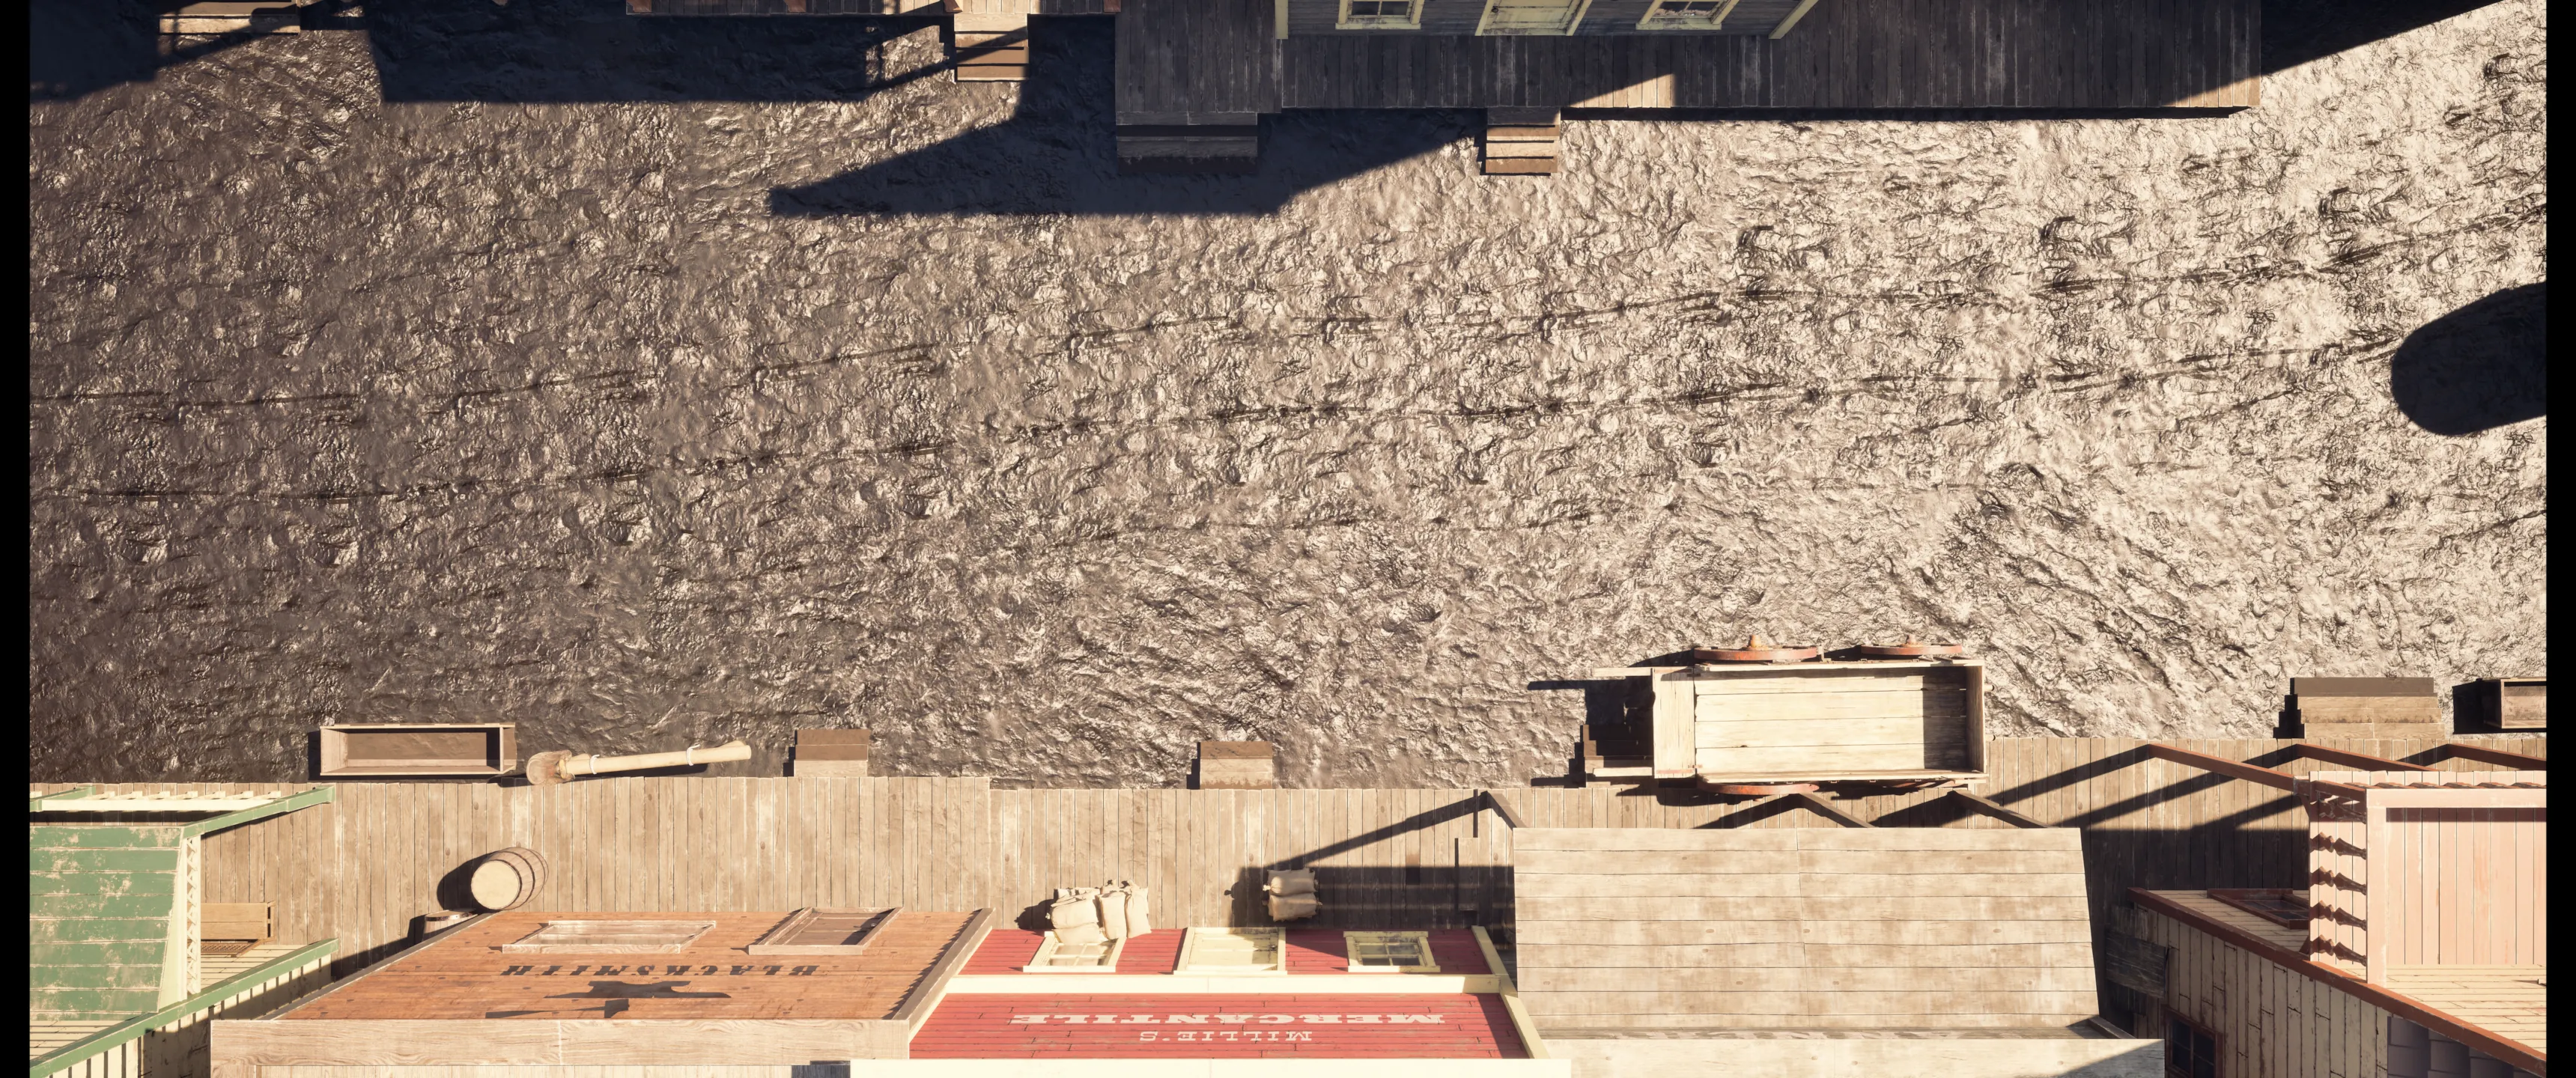
Finally, I color graded the scene by taking a screenshot of the UE5 editor, adjusting the colors in DaVinci Resolve, and generating a LUT (Look-Up Table) that I then imported to UE5. You can see a comparison of the scene without and with the LUT applied below:

Summary
Though exhausting due to the sheer number of new things, overall this was a fun project to work on and allowed me to learn a lot of valuable skills. There is a lot of room for improvement still, but I think I managed to get a pretty believable end result, and that with the ability to build it out some more in the future, should an opportunity arise.
Tools used
- blender for modeling
- Adobe Substance 3D Designer for procedurally creating most materials
- Adobe Substance 3D Painter for creating variation masks and certain textures
- Unreal Engine 5 for scene setup and rendering
- DaVinci Resolve 19 for color grading
Credits
- Tutorial by FastTrackTutorials
- credits for all external assets in this scene to their respective owners